Sunday, 16 June 2013

More Painting Progress

Sunday 16 June 2013

I managed to get quite a bit of paint spraying finished yesterday, (Saturday), in particular most of the small components and the frame.


At the risk of repeating myself, there's over 40 parts to spray and it is taking up a lot of time. This includes the pre paint prep as well of course. The finished coat seems to have a good shine to it anyhow.


Note to self - don't mix up the top coat of two pack acrylic paint expecting to use it again in the morning, see below. One lump or two!


Better get another tin of paint tomorrow in Limassol as I still have the side panels, leg-shields, horn-casting, front mudguard and top headlamp cover to do.

On the upside, put up the flags, get the brass band fired up, the very first bit of re-building has started, beginning with the wheels & tyres


Friday, 14 June 2013

Painting Progress

Wednesday 12 Jun

Not much to report apart from the green etch primer is now over sprayed with grey primer / filler.
Unfortunately progress is only steady due to work and visitor commitments. Having said that, we had a great week with Sheena's sister Rhona and her daughter Danielle.


Here's a good clear picture record of the frame number. It may be handy to get a genuine certificate of authenticity in the future. I have no idea how to go about this but had heard of such a cert.


Here's the frame finished in grey


Last but not least a pile of bits ready for the  finish / top coat


I'm hoping to get the top coat started at the weekend. I think I will break it into two sessions as Wednesday was a 7.5 hour prep and spray day which was hard going, I was cream crackered at night with a sore back to boot.

Hopefully the blog will get more interesting as the re-build gets under way.

Please feel free to add comments that is if anyone actually reads this :)


Friday, 31 May 2013

Spray Painting Begins

31 May 2013

I had a day off work to get on with the painting.

The last thing I want is to let any oxidation get established on this bare metal.

So it was off to Orinos in Pafos for primer / filler and top coat paints both are acrylic two pack.

I already had the etch primer.

€70 lighter it was back home to get cracking.


From the left it is etch primer, middle is primer / filler and right is the white top coat.

The little tin with the red top is acrylic thinner, the big white plastic container is a US gallon of cellulose thinner.

Whilst cleaning up, I noticed that cellulose thinner burns the back of my hands but not the front. At this point I put on some latex gloves which promptly melted. Then I found and used my "everything proof" rubber gloves. Better late than never.

The mask I'm using is not that good, I'll have to find something better. Mind you, I shouldn't have any trouble with rusty lungs!


Although all the grey stuff looks like it is painted, this is actually the bare metal, the green being the etch primer.


It is amazing how time consuming painting fiddly little parts is compared to flat panels. As 95% of the job is small parts, frame etc. this is going to take a lot longer than I thought.


At 3.30pm Sheena suggests I knock it on the head for today. Excellent idea, down to the Giraffe Bar for a few pints of Beacon bitter. I needed to wash the overspray down with something.

Thursday, 30 May 2013

Everblast Yiannis Returns The Scooter Parts


Thursday 30 May 2013

Here are before and after pictures of the engine. I should be able to cut down my Swarfega use now!

You can see a bit of the nice clean blasted frame with the engine, here's a better photo below


All this new metal gagging for a coat of etch primer


Thanks Yiannis for doing a blasted good job.

It's off to Pafos tomorrow to get some good thinners and possibly some top coat as well

Monday, 27 May 2013

It has been a while since the last post but here we go again


Hello again blogees, it has been about 5 weeks since I had chance to devote time to blogging and work on the scooter generally. (Busy damp proofing our house, helped by Queen of the Kangos, my one and only wife, Sheena).

Enough of all that, here are the side panels ready to go to Yiannis the blaster with whom I have managed to make contact again. It turns out my house is a black spot for mobile reception so when he calls me it goes to "phone not available"

He sat in the village for 15 minutes trying to contact me and collect the bits last week.

The blue panels came with the scooter, I added the scratches, see earlier post.

As far as I know, they are the LI style as opposed to the SX, but I read somewhere that the Innocenti factory would sometimes release new scooters with whatever panels they had enough of at the time. As Wikipedia would say, some validation needed on that.

The new SX style panels are in grey primer, although I will have them blasted anyway as they are a bit scruffy. These I bought from a guy called Roger in Hitchin.

His name is Roger, not Roger in Hitchin, that sounded a bit medieval when I read it over.

Moving on, he tells me he made his own stamping mould and presses them himself. Not cheap at 100 quid each but what can you do. I couldn't find them anywhere else.

It was pure luck that I found Roger while I was on holiday in Stevenage, as Hitchin is only about six miles away.

The new panels fit extremely well with only minimal adjustment needed so there you go, it was worth it.

 
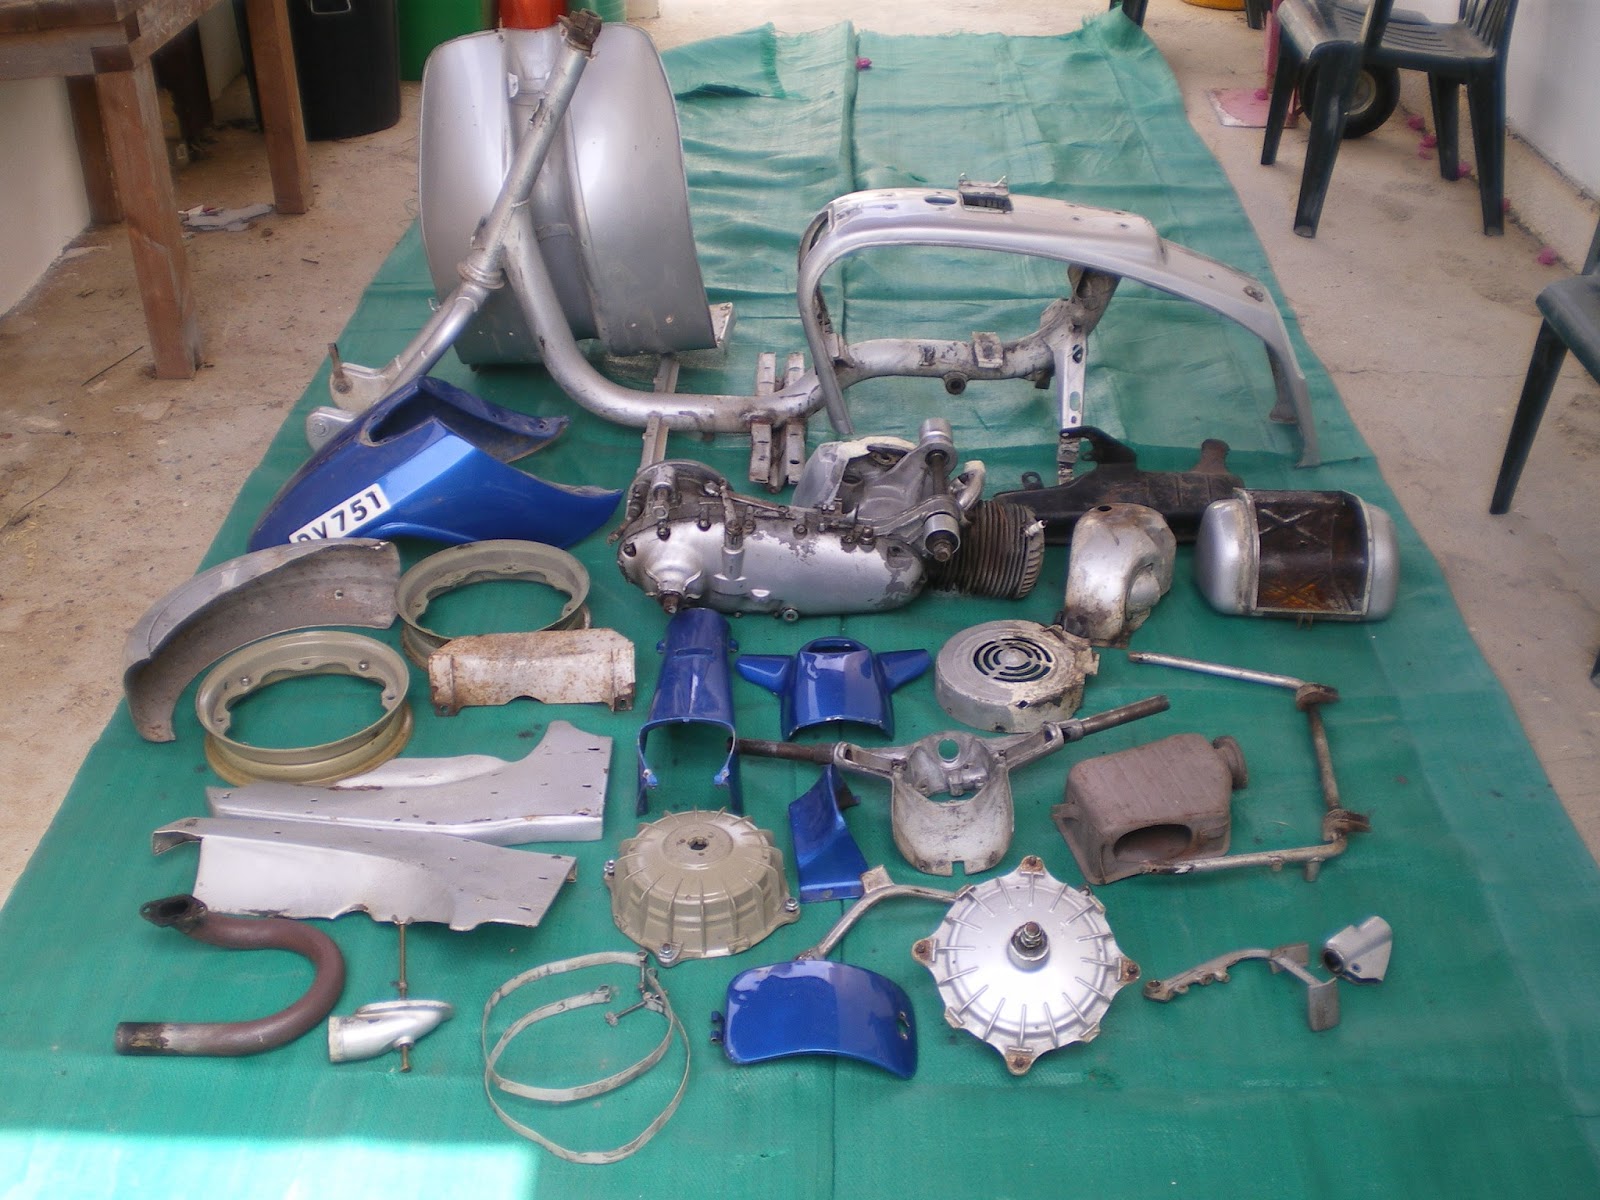
These are the parts going off to Yiannis (spare wheel rims missing from photo but they're going as well)
 
38 pieces altogether. I hope to get 38 back :-)
 
The plan is to soda blast the engine (baking soda that is) as this is the most gentle form, suitable for delicate old bits particularly aluminium.
 
The rest will be plastic bead blasted.
 

At long last, the car is loaded with the Lammy and off to Yiannis (Friday 24 May)

All being well I should get it back this week and crack on with the etch priming.


Sunday, 21 April 2013

Final Stages of Strip Down

It hasn't taken long to get to this stage, all the bits removed are bagged and labelled so I shouldn't spend hours looking for things on the final build.

I know you can cut lambrettas down for racing but I think I've overdone it a bit!!

Ah there's the rest of it. Just the stand left to remove

Here's the engine number. Numbers started from 750.001 for this model.
 
Here's the frame number. It falls between 767230 - 781074 which were the frame numbers for SX150's of the 1968 vintage. Now where's my flask and sandwiches, oh here in my anorak :)

Note to self again - Remember to fit the rear frame badge early on before the electronic ignition CDI and Regulator units and the rear mudguard get in the way.

Can't start the painting till I'm back of hols on 1 May.

Needless to say there will be another bag full of scooter bits coming back with me.

I've got Sheena a new stainless steel fuel tank for her birthday, I hope she appreciates it.


Wednesday, 17 April 2013

Here we go again, stripping down to maneagble parts so I can start the painting programme

It's even easier the second time around. I found myself going so fast, I couldn't keep up bagging and marking all the bits. Brakes on a bit, keep things in an orderly chaos.

Here's a pic of the brake pedal linkage and stop light to remind me how it goes back

Here's another one for good measure

Air box tool box and fuel tank all removed.

NB Remember to fit fuel tank before tool box and the tool box before the air box. In fact it's easier to fit the rear carrier before any of the above.

There's the frame number which proves it is a genuine Italian model


Here's photos of the 12v conversion coild and rectifier.  Both these need to be moved forward a bit to give better access to connections, drill and tap thread into frame.


That's it for today 17 April.

Probably not much more that an hour needed to whip the engine out and strip the last few bits.

Better chase the Everblast man again