Saturday 21 September 2013
No sign of the parcel of spare parts I was hoping for this week. I wanted to get the kickstart re-assembled and the chain guides sorted so I could put the engine back together and get it fitted.
Never mind, there's plenty of other bits to get on with such as the fuel tank.
This is a new stainless steel tank from Cambridge Lambretta. It looks like something off a McLaren F1 car. When the bike was running previously, the jets in the carb would block up regularly which was a nuisance as it was a carb strip each time to clear them. The old tank was quite grotty inside even though it had been treated with Petseal which was supposed to seal up the rust etc.
The fuel tap is a modified fast flow type with rear outlet (Cambridge Lambretta). The original fuel outlet was tight up against the engine mounting and flywheel cowl which made it awkward getting the fuel pipe on and off and could lead to a kinked pipe / fuel starvation.
The fast flow bit does what it says on the tin, it's especially good for high performance tuned engines. (Maybe one day??). When the fuel tank goes on to reserve, there is a time lag before you can make the switch on the fuel tap, so the engine, being a two stroke, runs without lubrication. The fast flow gets the fuel and oil mix there quicker, so I'm told. Time for another photo.
The filler cap looks a bit scruffy, I'll give it a coat of paint later.
Bottom half of the headstock in place
Rear brake pedal fitted ready for its cable
Toolbox and door in place
From the back
Lambretta in the '60's thoughtfully provide a tool box, handy for your two stroke oil, a few essential tools and for hiding recreational medicine - allegedly!
Saturday, 21 September 2013
Tuesday, 17 September 2013
Starting at the Back
Tuesday 17 September 2013
I decided to start at the back end as there are a few fiddly bits and certain things have to be assembled in the correct order, as I discovered on the dry re-build.
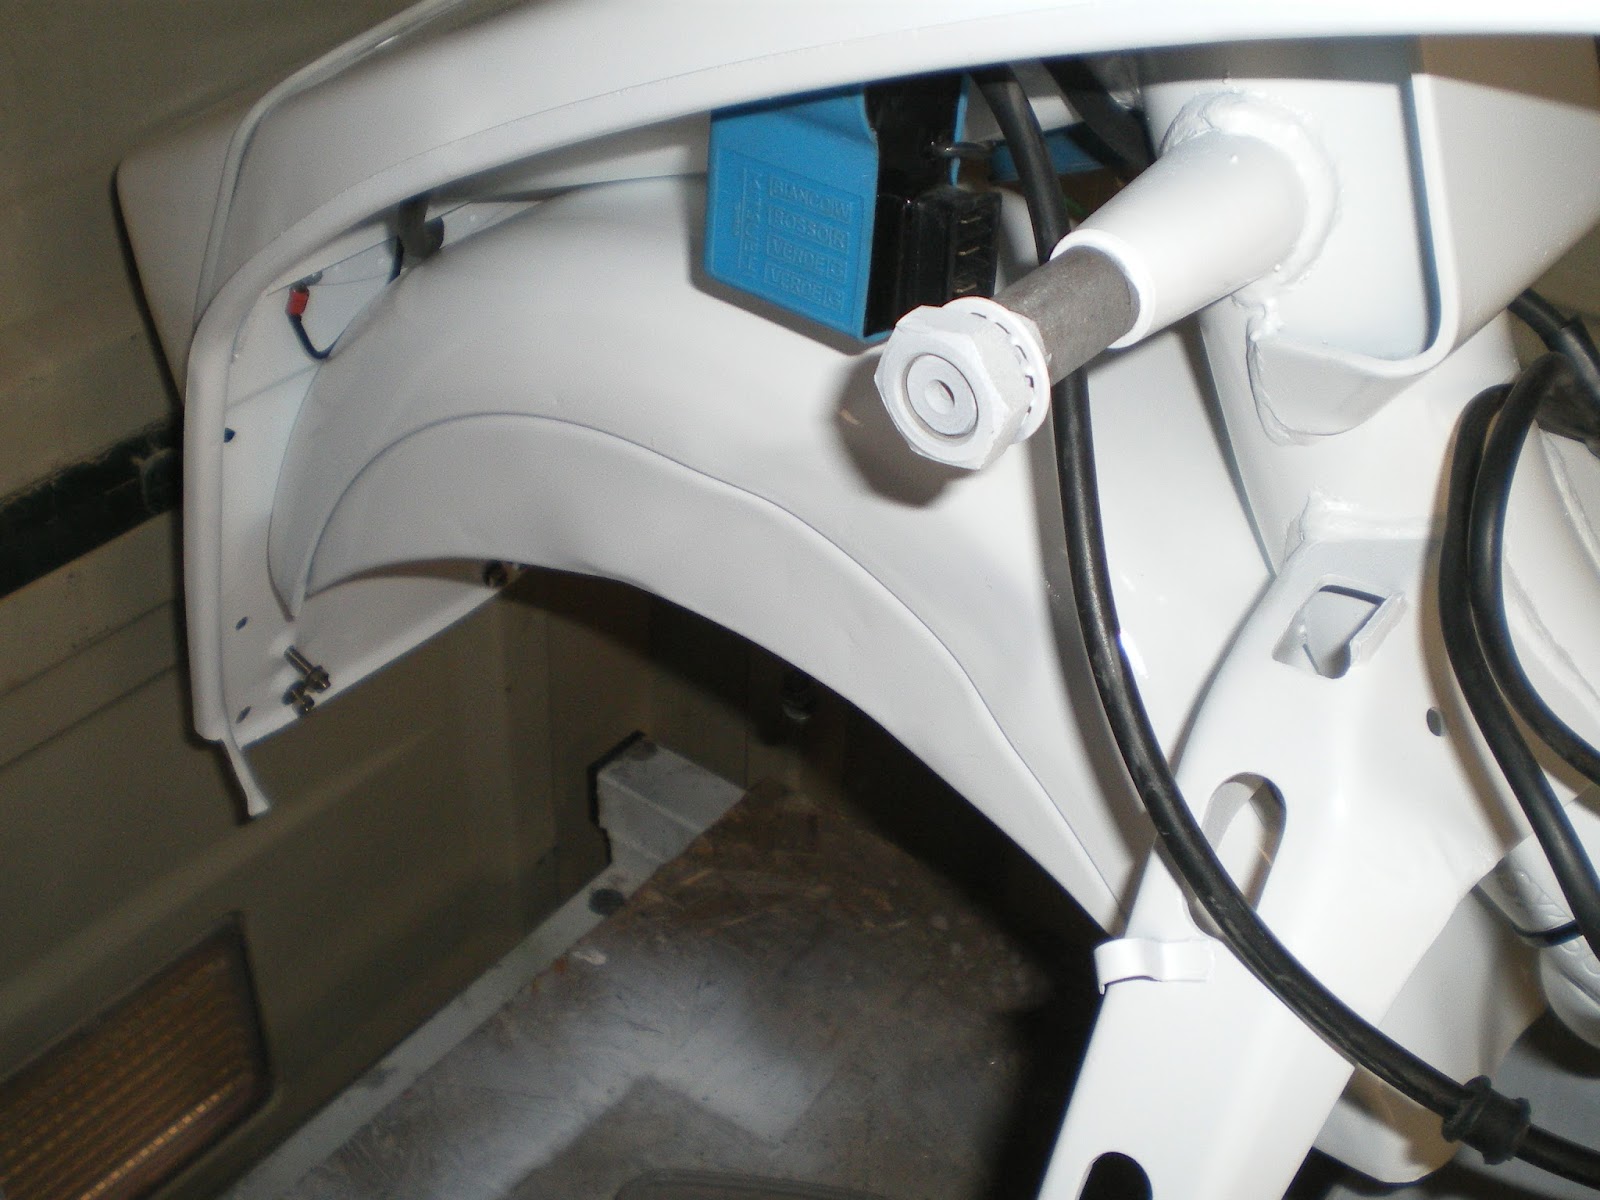
The voltage reg. needed to be moved forward from its previous position as it was difficult to connect the wires, the mudguard being in the way. This meant drilling new holes in the frame and tapping out to M6. While I had the drill going, it seemed sensible to drill a hole for the assorted earth leads.
This blue thing is the CDI unit (capacitor discharge ignition) which sounds like a modern version of a coil, i.e. it produces the high voltage for the spark. I fitted it to the existing mounting holes but it just doesn't seem in the right place to me. The holes would have been for the old 6v coil.
Sure enough, it is fouling on the back mudguard.
More holes drilled in the frame, it's starting to look like a Swiss cheese now. This part of the frame is not really load bearing at this point so no probs. It's now clear of everything and looks much better.
The photo below is me looking a bit confused, not for the first time!
Got it figured out now, time for a break.
I decided to start at the back end as there are a few fiddly bits and certain things have to be assembled in the correct order, as I discovered on the dry re-build.
The voltage reg. needed to be moved forward from its previous position as it was difficult to connect the wires, the mudguard being in the way. This meant drilling new holes in the frame and tapping out to M6. While I had the drill going, it seemed sensible to drill a hole for the assorted earth leads.
This blue thing is the CDI unit (capacitor discharge ignition) which sounds like a modern version of a coil, i.e. it produces the high voltage for the spark. I fitted it to the existing mounting holes but it just doesn't seem in the right place to me. The holes would have been for the old 6v coil.
Sure enough, it is fouling on the back mudguard.
More holes drilled in the frame, it's starting to look like a Swiss cheese now. This part of the frame is not really load bearing at this point so no probs. It's now clear of everything and looks much better.
It may seem an odd time to add chrome-work but the nuts and bolts for the rear carrier are a sod to get to with everything in place, so on goes the back rack along with the back light unit.
The photo below is me looking a bit confused, not for the first time!
Got it figured out now, time for a break.
Sunday, 15 September 2013
Final Build
15 September 2013
Here I am back in Cyprus and have finally made a bit of time to start the final build.
Whilst I was in UK I called in at Cambridge Lambretta, (along with my son Jamie), to get a new speedo. A very helpful guy called Ian sorted out an SX style speedo for me, and Jamie decided to buy it for my birthday. Very nice thanks Jamie.
This left me some spare cash so I decided I would go the extra mile and get a new kickstart shaft as the splines on mine are badly worn.
Not a great photo but take it from me the splines are badly worn. I'm certain if I don't fix this now it will come back to haunt me later.
The chaincase came off with very little effort.
The tangled lumps of metal used to be the upper chain guide. Luckily they didn't get caught in the gears which if they did, could have jammed the works well and proper.
Another poor photo I'm afraid but the damaged bolt is one of the chain guide retaining bolts. The bit it's resting on is the knackered upper chain guide. Without the guide, the chain has been sagging and wearing the bolt away. As far as I can tell, the chain is OK, it obviously must be made of harder steel than the bolt.
I have since learned that the original chain guides were not up to the task and uprated nylon ones are now available.
On inspection, the kickstart piston is a bit worse for wear and the return spring has a crack in it. There is some burring to the return guide block also. Looks like all the kickstart components need to be replaced
All the new parts are now on order and hopefully will be here in a week or so.
There's plenty to be doing in the mean time so I fitted the voltage regulator and CDI unit today.
The regulator was originally attached to the rear footboard support strut but now is on the rearmost upper frame tube opposite the CDI unit where it should be. This meant drilling new holes in the frame and tapping them out to M6 and fitting new mounting bolts. All done now so the wiring harness can be fitted next.
Here I am back in Cyprus and have finally made a bit of time to start the final build.
Whilst I was in UK I called in at Cambridge Lambretta, (along with my son Jamie), to get a new speedo. A very helpful guy called Ian sorted out an SX style speedo for me, and Jamie decided to buy it for my birthday. Very nice thanks Jamie.
This left me some spare cash so I decided I would go the extra mile and get a new kickstart shaft as the splines on mine are badly worn.
Not a great photo but take it from me the splines are badly worn. I'm certain if I don't fix this now it will come back to haunt me later.
The chaincase came off with very little effort.
The tangled lumps of metal used to be the upper chain guide. Luckily they didn't get caught in the gears which if they did, could have jammed the works well and proper.
Another poor photo I'm afraid but the damaged bolt is one of the chain guide retaining bolts. The bit it's resting on is the knackered upper chain guide. Without the guide, the chain has been sagging and wearing the bolt away. As far as I can tell, the chain is OK, it obviously must be made of harder steel than the bolt.
I have since learned that the original chain guides were not up to the task and uprated nylon ones are now available.
On inspection, the kickstart piston is a bit worse for wear and the return spring has a crack in it. There is some burring to the return guide block also. Looks like all the kickstart components need to be replaced
All the new parts are now on order and hopefully will be here in a week or so.
There's plenty to be doing in the mean time so I fitted the voltage regulator and CDI unit today.
The regulator was originally attached to the rear footboard support strut but now is on the rearmost upper frame tube opposite the CDI unit where it should be. This meant drilling new holes in the frame and tapping them out to M6 and fitting new mounting bolts. All done now so the wiring harness can be fitted next.
Saturday, 27 July 2013
Summer Holidays 2013
Sunday 28th July 2013
That's work finished till the second week of September when I'm back from the UK. It has got far too hot now anyway.
I have a number of parts to order and bring back with me as usual, all little things this time.
Hopefully I should be on the road by middle September.
That's work finished till the second week of September when I'm back from the UK. It has got far too hot now anyway.
I have a number of parts to order and bring back with me as usual, all little things this time.
Hopefully I should be on the road by middle September.
Saturday, 13 July 2013
Paintwork Completed
Saturday 13th July
This is just a quick entry to say the paintwork is now complete.
I have re-sprayed the side-panels so the edge of the blue / white line disappears under the metal flash as previously mentioned.
Fortunately, the overall look and shine of the paint on the panels is better than I have achieved before, so as an amateur paint sprayer, I'm happy with it.
Now it's on to the re-build which will now start in earnest in September after our summer holidays in UK, although I'm doing little bits and pieces when I get chance.
This is just a quick entry to say the paintwork is now complete.
I have re-sprayed the side-panels so the edge of the blue / white line disappears under the metal flash as previously mentioned.
Fortunately, the overall look and shine of the paint on the panels is better than I have achieved before, so as an amateur paint sprayer, I'm happy with it.
Now it's on to the re-build which will now start in earnest in September after our summer holidays in UK, although I'm doing little bits and pieces when I get chance.
Sunday, 7 July 2013
More Problems With the Blue
Sunday 7 July 2013
Yesterday morning was spent rubbing down and masking the side-panels (again) ready to re-do the blue. There's not a lot of paint left, probably about enough for two coats. Will that be enough to cover?
There's about half a spray gun reservoir left. Hmm, I'm not optimistic.
That's the first one done.
This is me rushing round to do the second panel before the paint runs out!!
Doh! There are faint stripes in the finish where I've tried to stretch the paint out. Oh well, back to the shop tomorrow for more paint.
That's it, enough for today, I'm off to watch Andy Murray try to beat Jock-ovic (are they both Scots?) in the Wimbledon final.
Yesterday morning was spent rubbing down and masking the side-panels (again) ready to re-do the blue. There's not a lot of paint left, probably about enough for two coats. Will that be enough to cover?
There's about half a spray gun reservoir left. Hmm, I'm not optimistic.
That's the first one done.
This is me rushing round to do the second panel before the paint runs out!!
Doh! There are faint stripes in the finish where I've tried to stretch the paint out. Oh well, back to the shop tomorrow for more paint.
That's it, enough for today, I'm off to watch Andy Murray try to beat Jock-ovic (are they both Scots?) in the Wimbledon final.
Metallic Blue Paintwork
Saturday 29th June
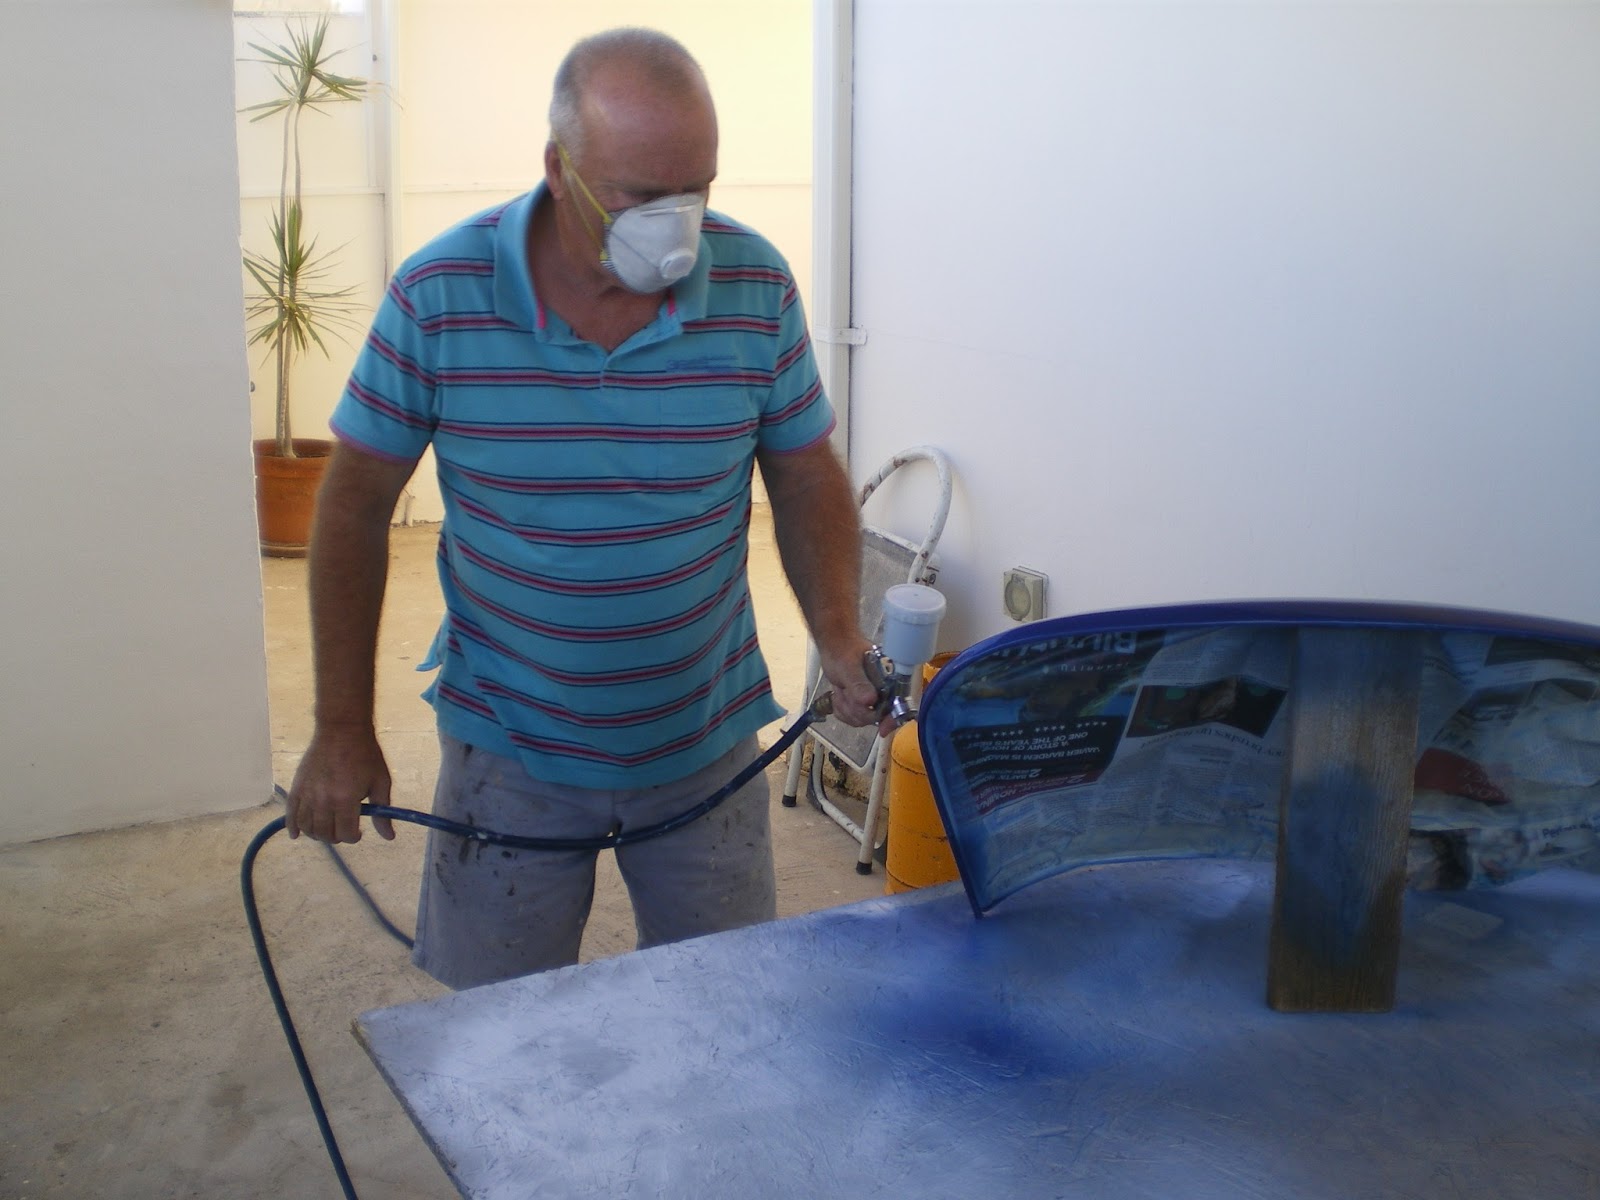
Above is me applying the dust-coat to which hopefully the other coats will stick. The colour is a Mitsubishi shade which I picked from the colour charts at the Orinos shop.
Not surprisingly, it gets darker with each coat.
OK, I'm fairly happy with this finish although some suicidal little bugs seem to want to land in it. I tried picking them off with tweezers but it makes more mess than leaving them. Maybe they will polish out later?
Here's t'other side with a few of coats of lacquer applied. It looks OK now but two coats ago, it went very dull. This was not good as lacquer is supposed to make it very shiny of course. Once mixed with it's hardener, there is a time limit before it starts to set. Although it was still spraying, it was actually going off in the spray gun. I quickly mixed up some new lacquer and problem solved, the shine came back, much to my relief.
Horn casting masked up.
Horn casting unmasked.
Side panel unmasked. Looks OK up to here, but bad news to follow.
I had masked the panel following the fold in the pressing but when I offered up the sidepanel flashes, as you can see there is a white stripe between the flash and the blue. Personally, I think this looks awful, the edge of the blue should be lost under the metal badge.
This means masking off in the right place then rubbing down the blue/white joint and all the rest of the blue and re-spraying. BoXX!ks. Back to the drawing board.
Here's the parts to be painted blue, all masked up and ready to go. I've used Frog Tape, mainly because I bought it in UK last March and haven't found a use for it yet. The makers claim it gives a good clean edge to the paint without any seepage. We'll see!Above is me applying the dust-coat to which hopefully the other coats will stick. The colour is a Mitsubishi shade which I picked from the colour charts at the Orinos shop.
Not surprisingly, it gets darker with each coat.
OK, I'm fairly happy with this finish although some suicidal little bugs seem to want to land in it. I tried picking them off with tweezers but it makes more mess than leaving them. Maybe they will polish out later?
Here's t'other side with a few of coats of lacquer applied. It looks OK now but two coats ago, it went very dull. This was not good as lacquer is supposed to make it very shiny of course. Once mixed with it's hardener, there is a time limit before it starts to set. Although it was still spraying, it was actually going off in the spray gun. I quickly mixed up some new lacquer and problem solved, the shine came back, much to my relief.
Horn casting masked up.
Horn casting unmasked.
Side panel unmasked. Looks OK up to here, but bad news to follow.
I had masked the panel following the fold in the pressing but when I offered up the sidepanel flashes, as you can see there is a white stripe between the flash and the blue. Personally, I think this looks awful, the edge of the blue should be lost under the metal badge.
This means masking off in the right place then rubbing down the blue/white joint and all the rest of the blue and re-spraying. BoXX!ks. Back to the drawing board.
Subscribe to:
Posts (Atom)